
What’s this blog post all about?
As part of my workshop on using the Raspberry Pi with Azure IoT Hubs using Node.js, we’ll spend some time getting your Raspberry Pi setup ready for the Workshop.
There are several steps involved in this process and the whole process can take roughly an hour and a half… So go and grab a cup of tea and make yourself comfortable!
Parts Required
The particular workshop concentrates mainly on a Raspberry Pi… So the parts you’ll need are;
- A Raspberry Pi, SD Card (At least 8GB) and Power Supply (Ideally a good 2 Amp one): http://bit.ly/nottsdeviotraspi – Preferably a Pi3… However, the code and electronics are compatible with everything from a Pi B+ upwards.
- An HDMI cable to connect to a suitable HDMI capable monitor.
- A Keyboard and Mouse.
- A small set of electronic parts – This kit from Amazon will contain more than you’ll ever need: http://bit.ly/nottsdeviotkit, However, the basic requirements are;
- 2 x 220Ω resistors
- 1 x Red LED
- 1 x Green LED
- 1 x Push Button
- 11 x Male to Female Jumper Cable
- 1 x Breadboard
- Optional: 1 x BME280 Pressure / Temperature / Humidity Sensor: http://bit.ly/nottsdevtempsensor
- A SD Card Reader of some sort.
- A PC with an Ethernet Port
- Optional: A Particle Photon: http://bit.ly/nottsdeviotphoton
- Optional: A DFRobot Microsoft Azure IoT DevKit: http://bit.ly/nottsdeviotdfrobotdevkit
Software Required:
You’ll need a few bits of software to get your Pi upto speed and then to start developing with it;
- The “2017-07-05” version of Raspbian Jessie: http://bit.ly/nottsdeviotraspbian … You’ll need this exact version as there seems to be some issues with later versions of Raspbian and the WiringPi library
- An SD Card Formatting Program – I use SDFormatter: http://bit.ly/nottsdeviotsdformatter
- An SD Card Image Writer – I Use Win32DiskImager: http://bit.ly/nottsdeviotwin32disk
- An SSH Client – I use PuTTy – http://bit.ly/nottsdevputty
- Visual Studio Code – http://bit.ly/nottsdevvscode
Let’s get started
It’s worth mentioning again… This should work on all Pi’s from the Pi B+ onwards, however a Raspberry Pi Zero will obviously need some extra hardware in converters and pin headers.
Step 1: Prepping your SD Card:
Assuming you’ve bought all of your bits and installed all of the above software then the first thing to do is connect your SD card to your PC;
First, insert your MicroSD Card into an SD Adapter;
Insert Micro SD Card into Adapter
Then Insert that into an SD Card reader;
Insert SD Card into SD Card Reader
Finally connect the whole thing to your PC.
Step 2: Formatting your SD Card:
Once you’ve inserted your SD card, it’s important that you check what Drive Letter Windows has assigned it;
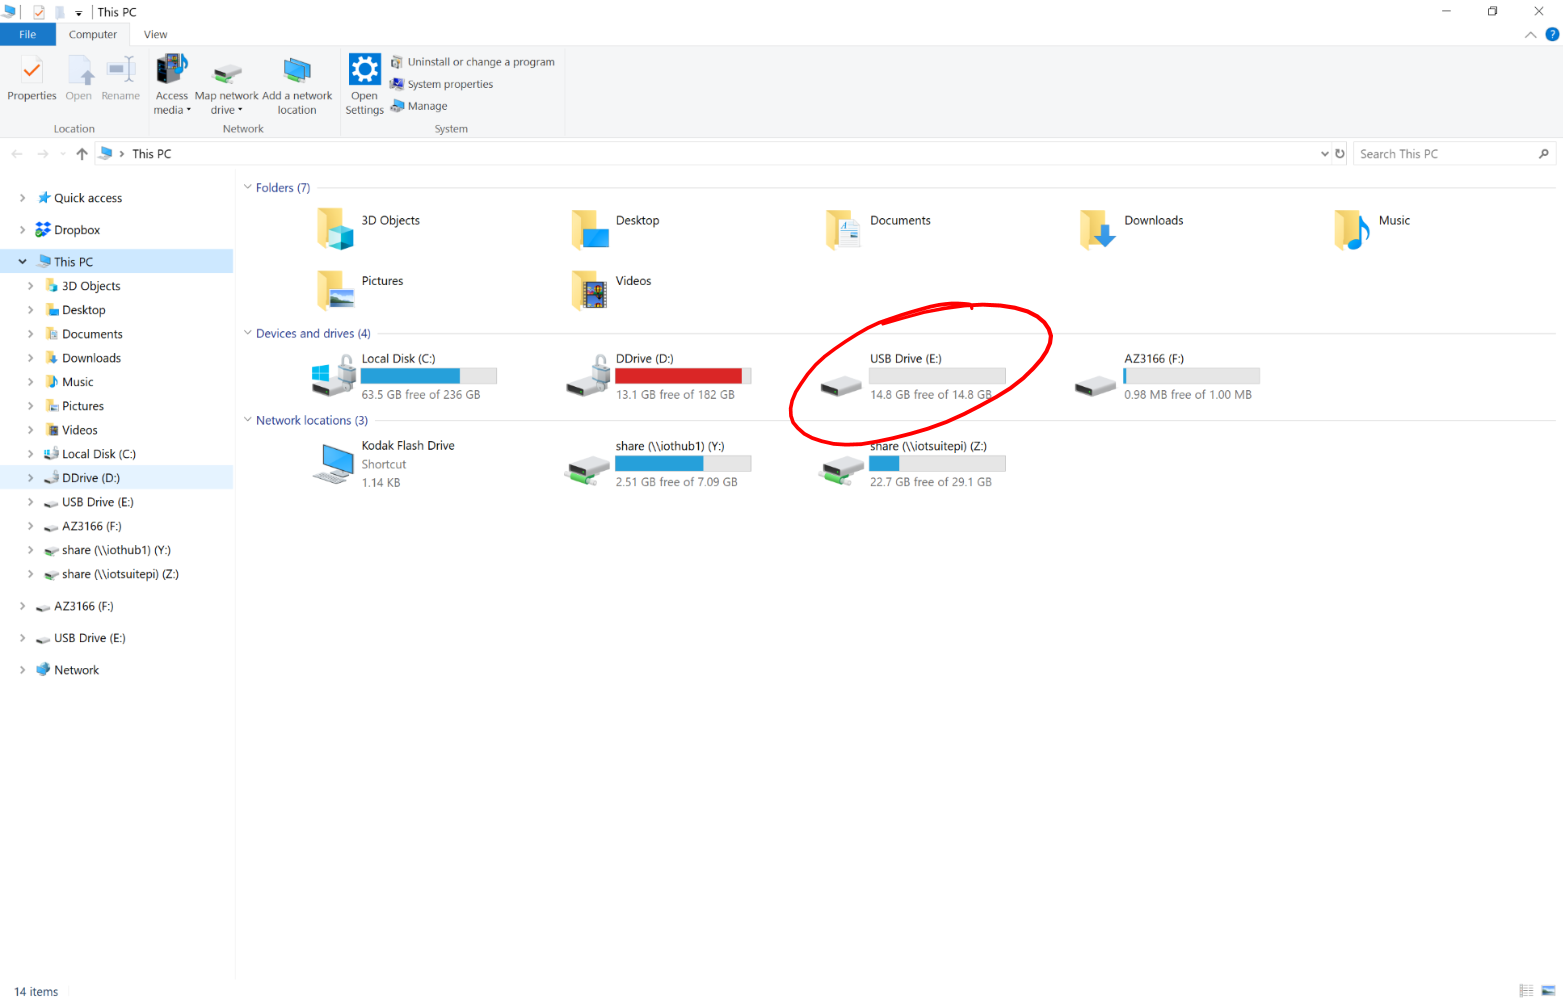
Identify the SD Card Drive Number
You can then go ahead and start SDFormatter;
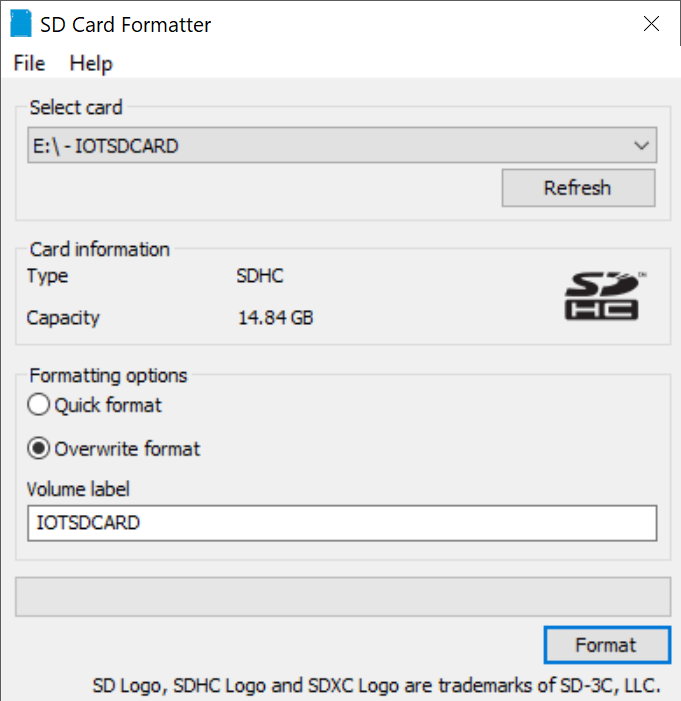
Here you MUST make sure you select your newly connected SD card from the “Select card” dropdown… Don’t make the mistake of formatting some attached storage device accidentally, as THIS PROCESS IS NOT REVERSIBLE! You can tell which card is which when you select it as the “Card information” section will update to show the card’s size and type.
I always select the “Overwrite format” option just so I know that the card is fully formatted. You can then name your card by entering a value in the Volume Label text box, and press the Format button to begin;
Formatting the SD Card
Step 3: Writing the Raspbian Jessie Image to the SD Card:
If you haven’t already, unzip the Raspbian Jessie SD Card Image;
Extract the Raspbian Jessie SD Card Image
At this point you should start the Win32DiskImager software;
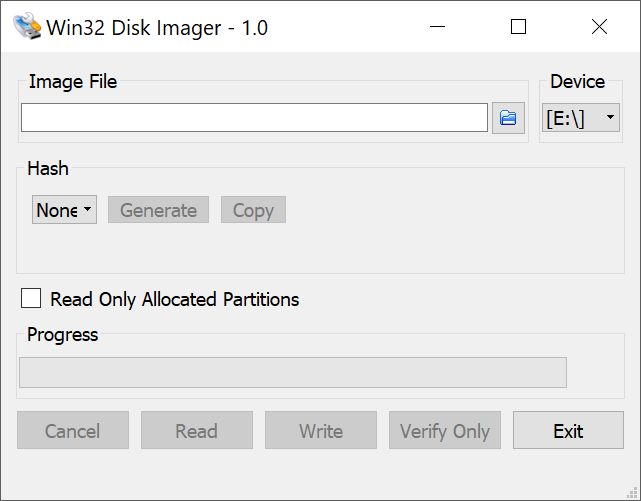
Make sure that you select the drive letter corresponding to your newly formatted SD card, then press the open button and find the Raspbian SD Card .img file you unzipped earlier. Once you have that, go ahead and press the “Write” button to begin writing your image to the SD Card… Once again, THIS PROCESS IS NOT REVERSIBLE!
You can now eject the SD Card using the “Safely Remove Hardware” dialog in the Tray;

Step 4 – First Bootup of the Raspberry Pi:
You can now insert your newly written SD card into the pi. Make sure you do this with the power disconnected!

You can now connect your Raspberry Pi to a Monitor and a Keyboard and Mouse… If you have got an older Raspberry Pi without OnBoard WIFI, then you can also connect either a USB Wifi Adapter or a Physical Network Cable.
Once you’re happy you’ve got everything connected, go ahead and plug in the power cable and watch the magic happen… After a few housekeeping tasks have been performed… You should be presented with the Raspbian Desktop in all it’s glory;
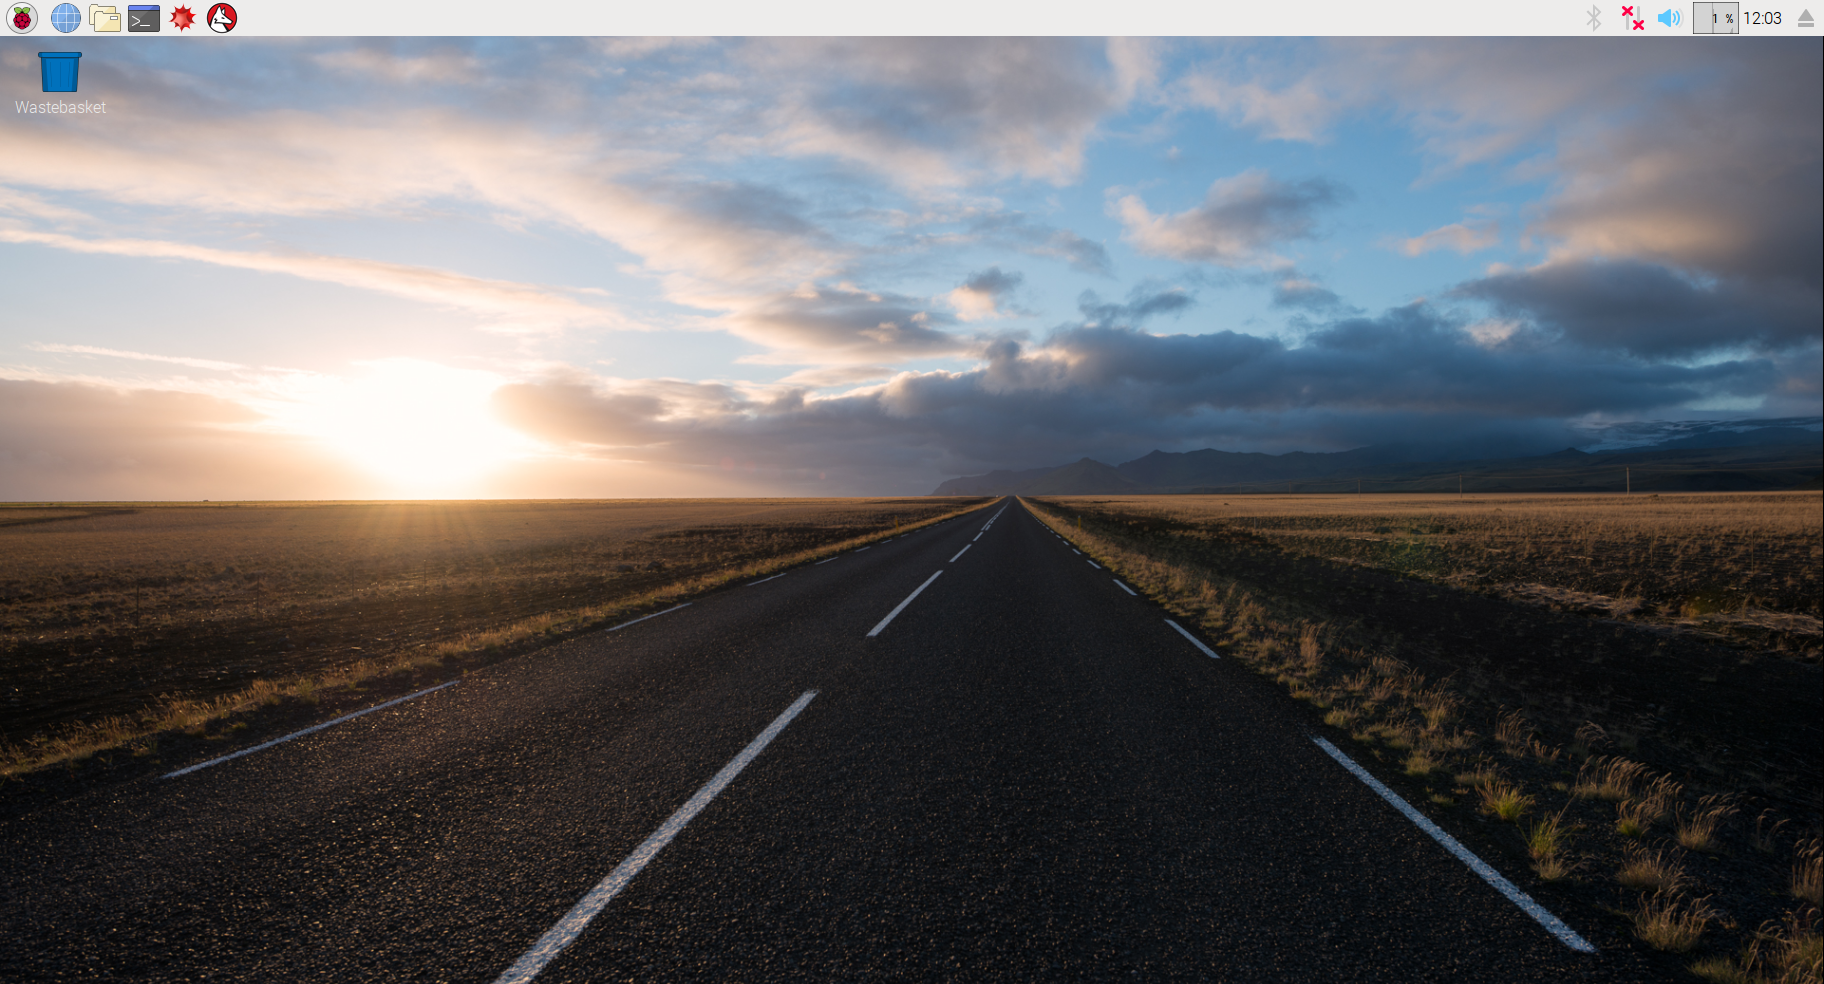
Step 5 – Basic Raspberry Pi Setup:
Now that you have your Pi all booted up and looking wonderful, it’s time to get it setup how we need it.
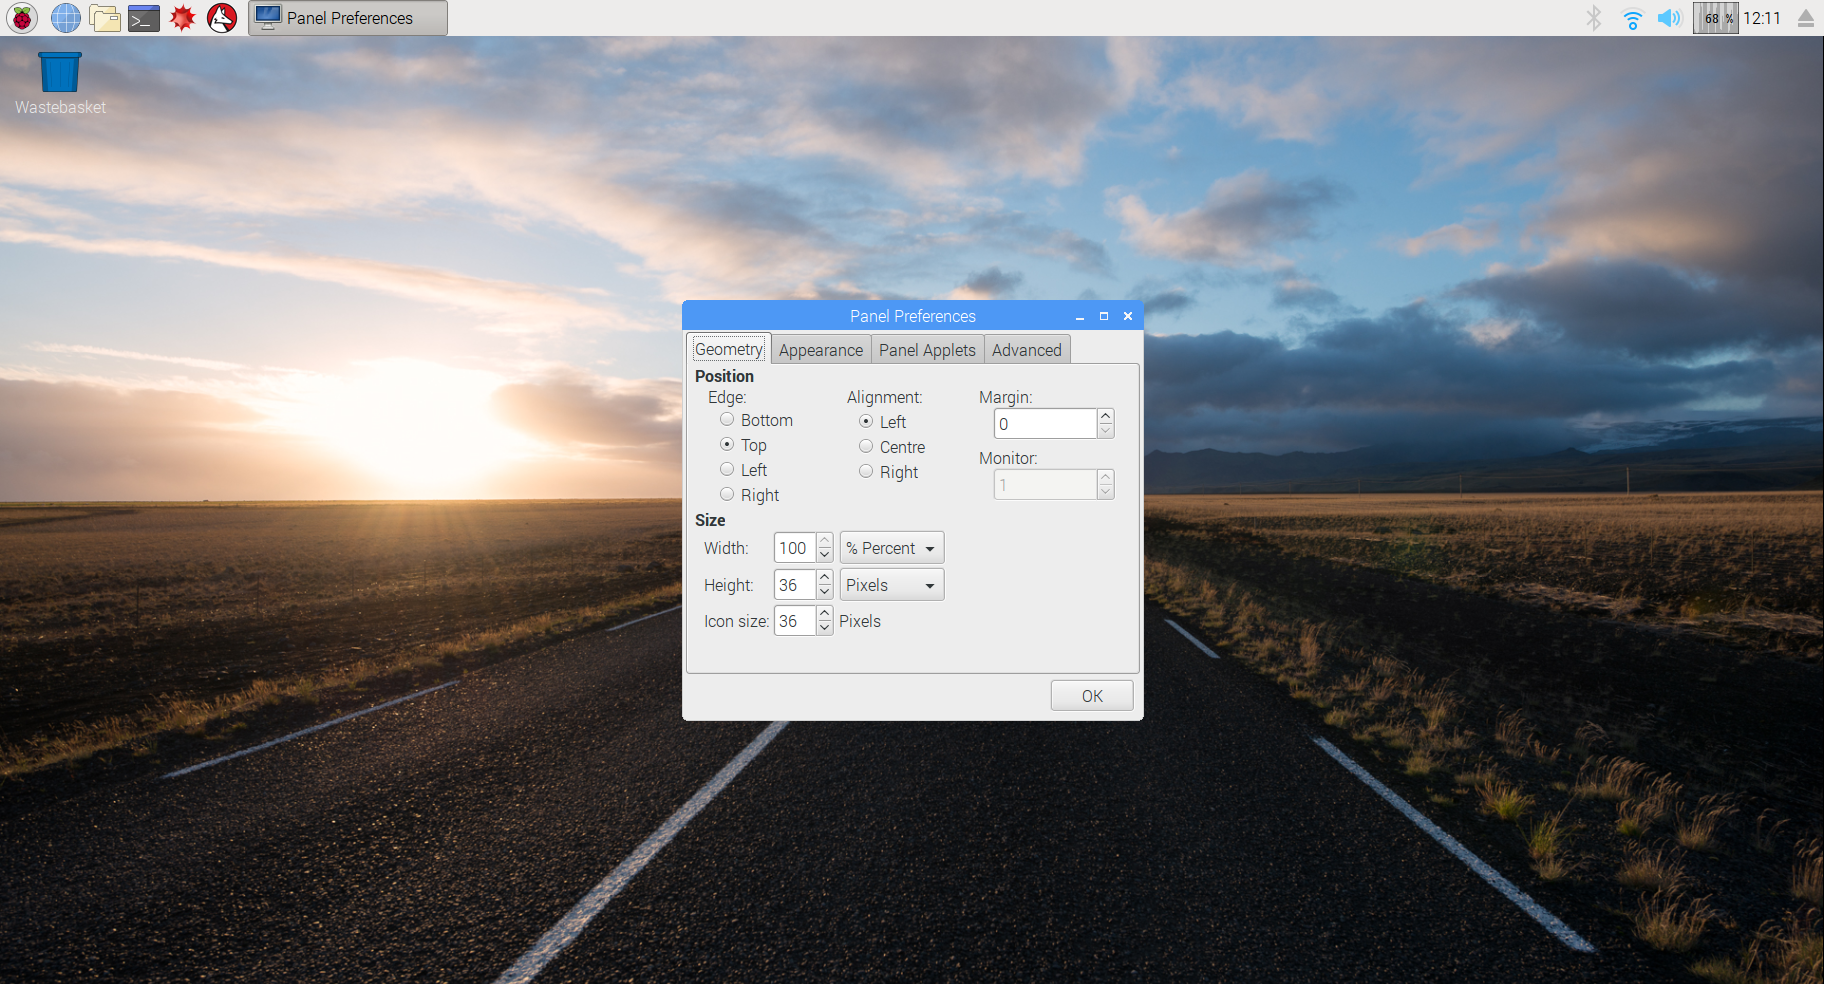
The first thing I do is move the Task Panel from the Top to the Bottom… This is purely a personal choice, coming from a Windows Desktop background. You can access the Task Panel properties by Right clicking on the Panel and selecting Panel Settings. You can then select the position of the Task Panel in the Position group panel;
We now need to configure our Raspberry Pi… If you press the Raspberry Icon on the far left of the Task Panel, it’ll open up the Application Menu. From here navigate to Preferences and Select “Raspberry Pi Configuration”;
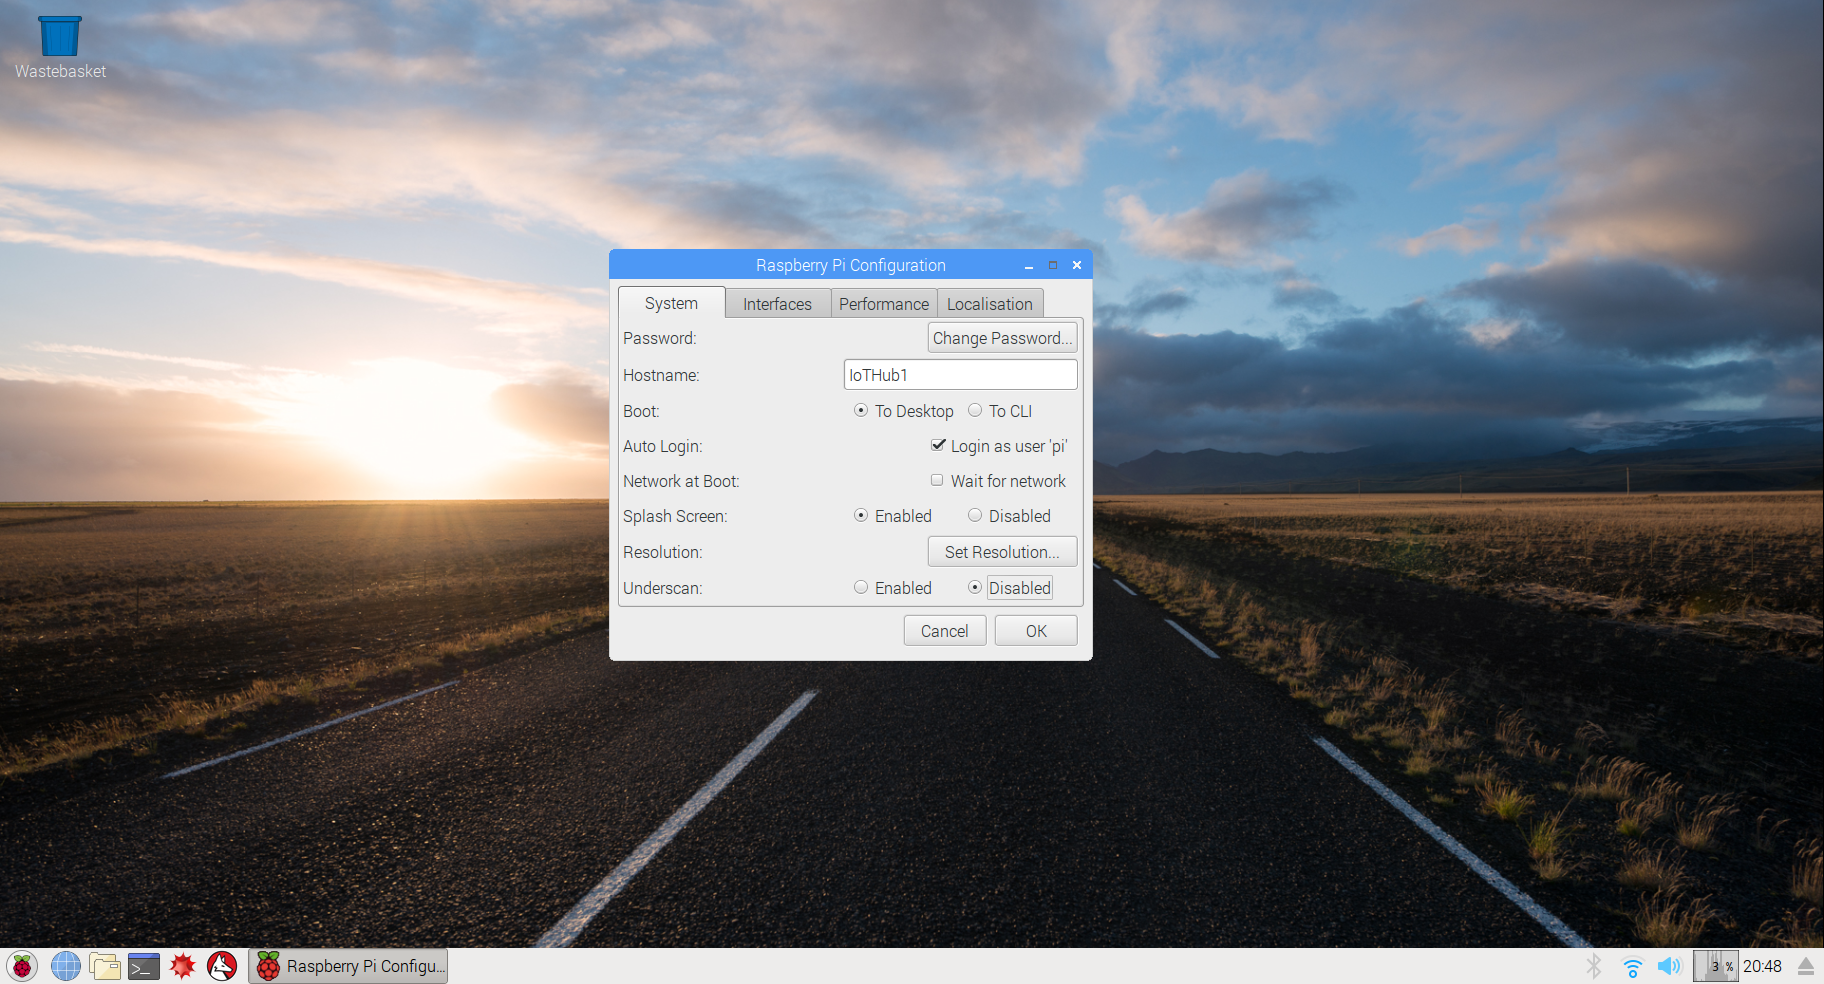
You’ll be shown the “Raspberry Pi Configuration” utility… This application allows you to configure the various system settings for the Raspberry Pi.
First we need to set the Host Name for our Pi… To make like easy we choose “IoTHub1″.
Next we need sort out the sizing of our desktop… You may notice that your desktop is surrounded by a rather large unsightly black border… We can sort this out by disabling Underscan”.
Next we need to enable the various hardware and software interfaces we’re going to be using, so move to the Interfaces tab;

We’re going to be using SSH, VNC, SPI and I2C… So go ahead and set those items to Enabled.
Next, if you’re using a Pi B+ or a Pi 2, then we’re going to moderately increase the speed of our Pi to make our lives a little more comfortable. However, if you’re using a Pi3, we don’t need to do this step as your Pi is plenty fast enough as it is… So you can happily just hit OK, and reboot to commit the changes.
However, if you need to, we can move to the Performance tab;
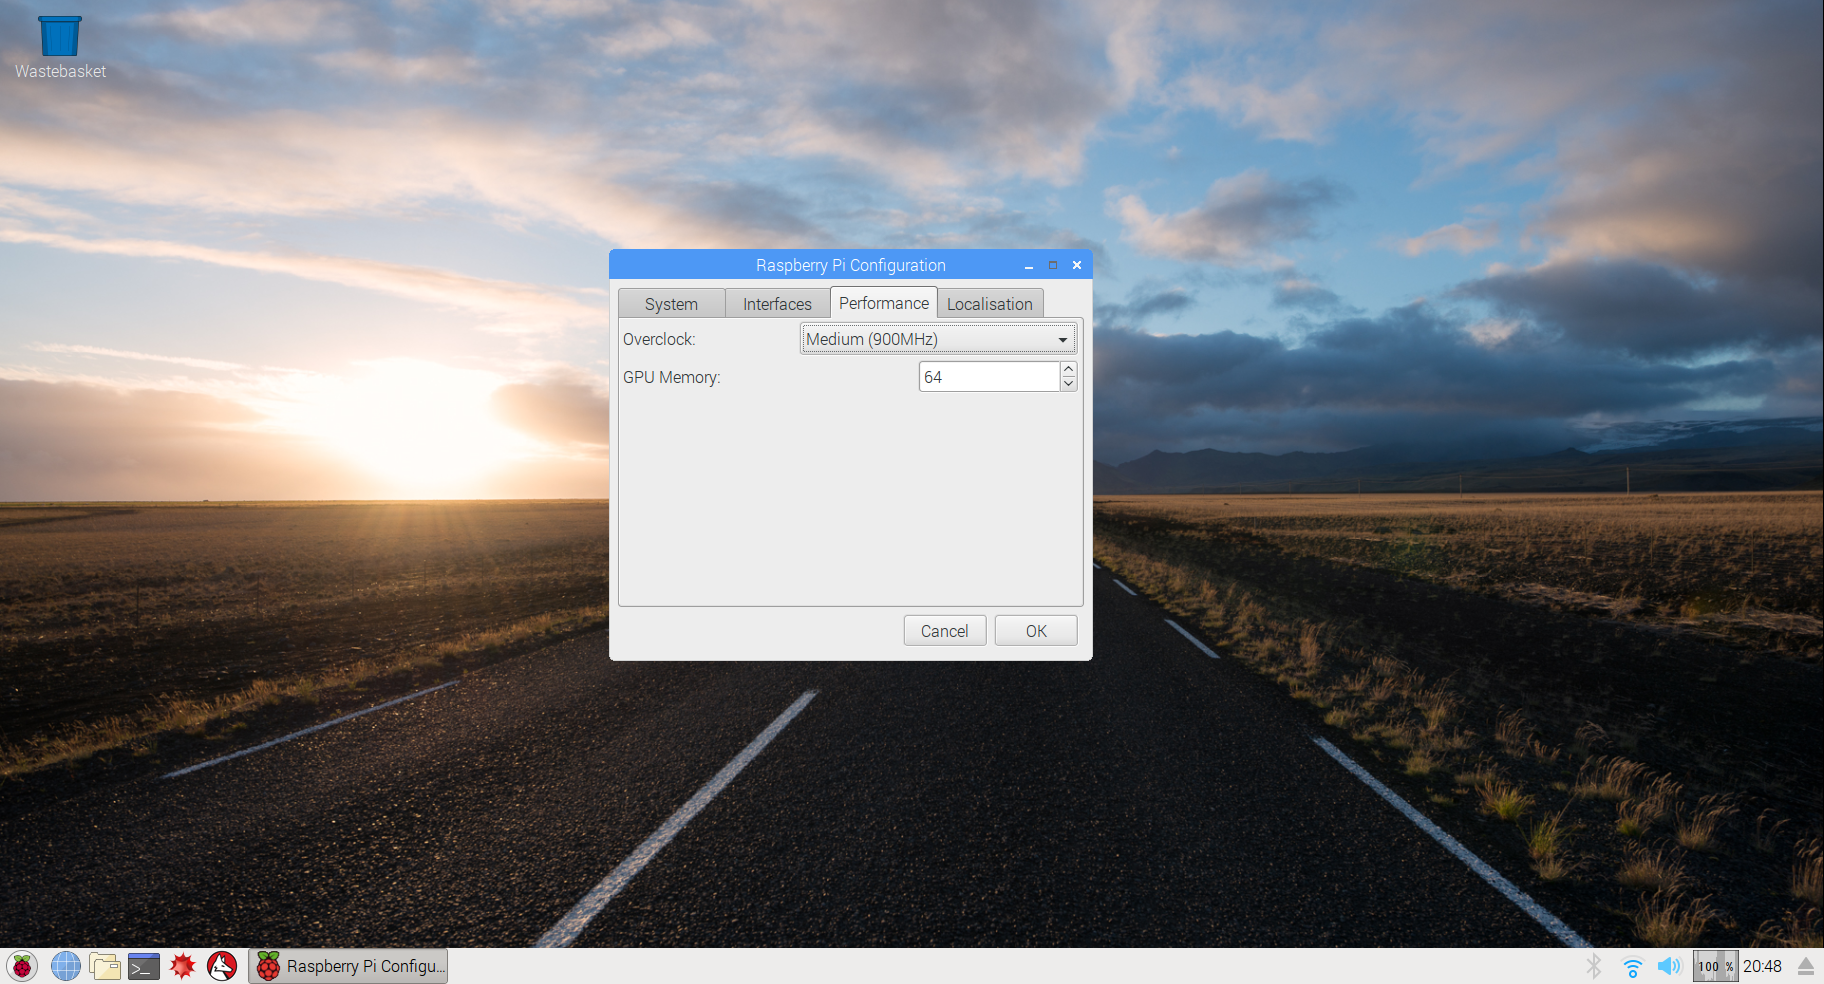
Go ahead and choose the “Medium” option… For this particular Raspberry Pi Model, that’s 900MHz. This will help the pi run just that little bit faster, making everything run a little more snappier.
Pressing OK now will save your settings and then prompt you that a reboot is required, which you should accept to apply the changes.
Step 6 – Connecting to the Pi using SSH:
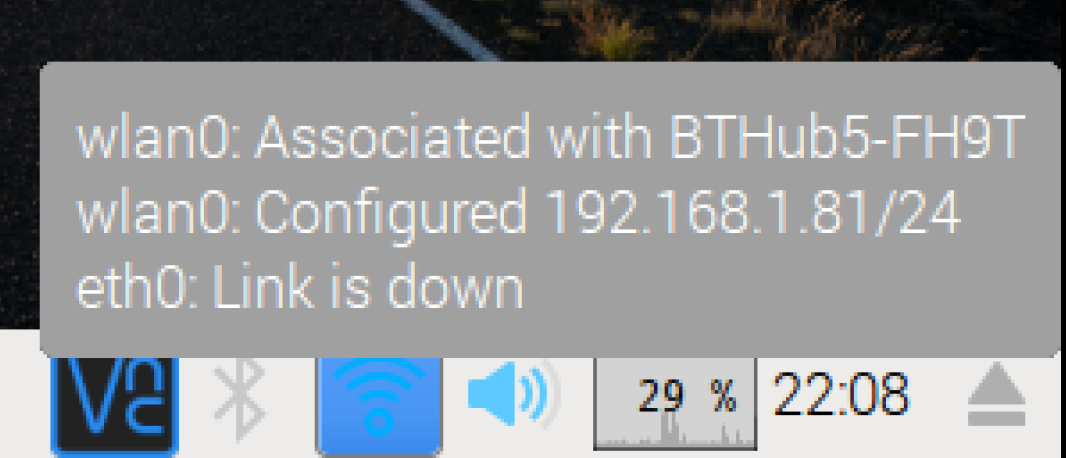
Once the Pi reboots, and assuming you’re going to be using Wifi, you can then connect to your Wifi network by pressing the network icon in the panel on the right hand side of your Task Panel, selecting your Wifi network and entering the Wifi key.
Once you have the network connected, if you hover your cursor over the network icon you’ll be shown the current ip address;
Now that you know the ip address of your Pi, we can connect to it using PuTTY. Opening PuTTY you’ll be shown the main PuTTY user interface;
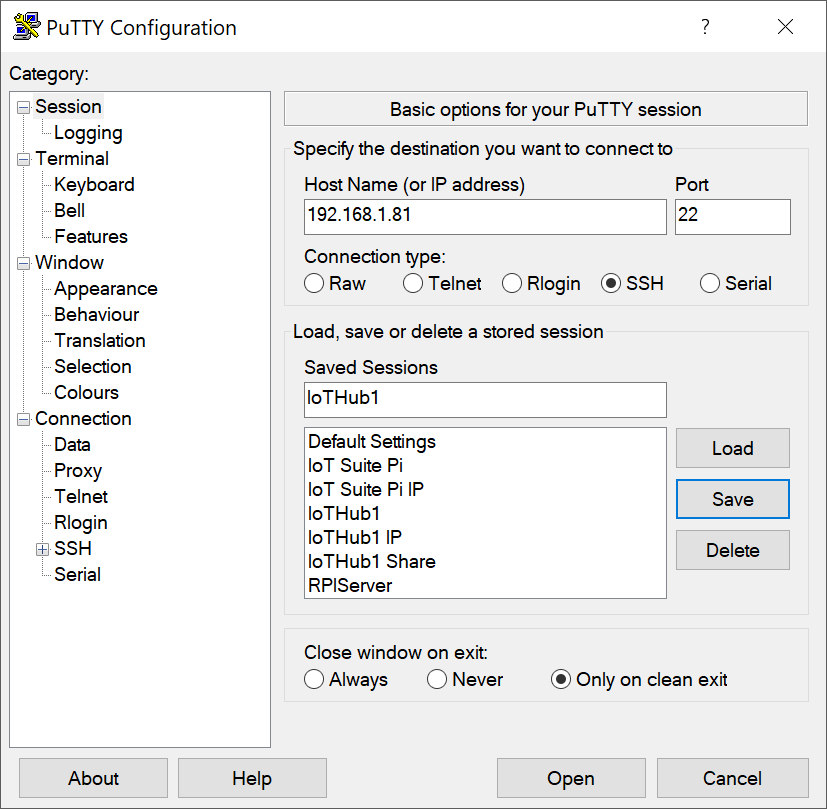
If you enter the IP address of your Pi in the “”Host Name (or IP address)” text box, a name for this connection, for instance IoTHub1 in the “Saved Sessions” textbox and press the “Save” button, then we’ll be able to reuse this connection later. Once you’ve saved the connection you can make sure that it’s selected from the list and press the “Open” button.
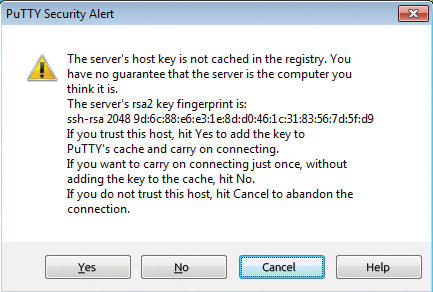
The first time you connect to your Pi, PuTTY may warn you that the “Server’s Host Key is not cached in the Registry” or of a “Potential Security Breach”, this is totally normal and you can press the “Yes” button to continue to connect to your Pi;
Once the dialog is closed, you’ll be presented with a window prompting you to enter the user name to login in as;
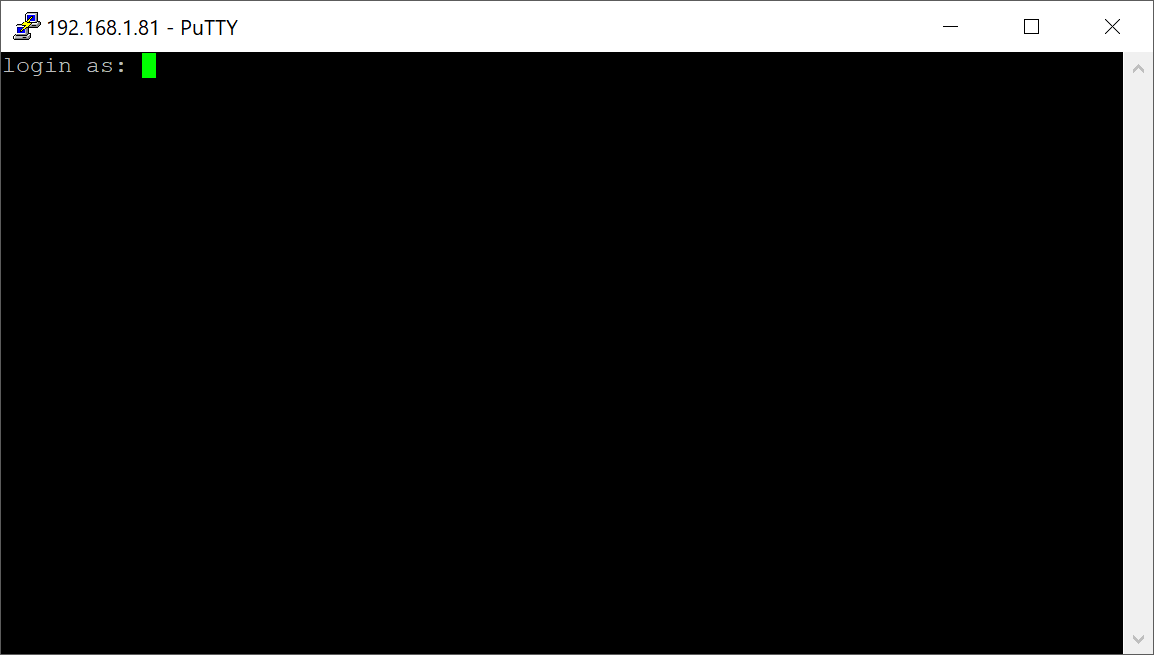
Here you enter the default user for a Raspberry Pi which is simply “pi”, after which pressing the return key will then prompt you for your password;
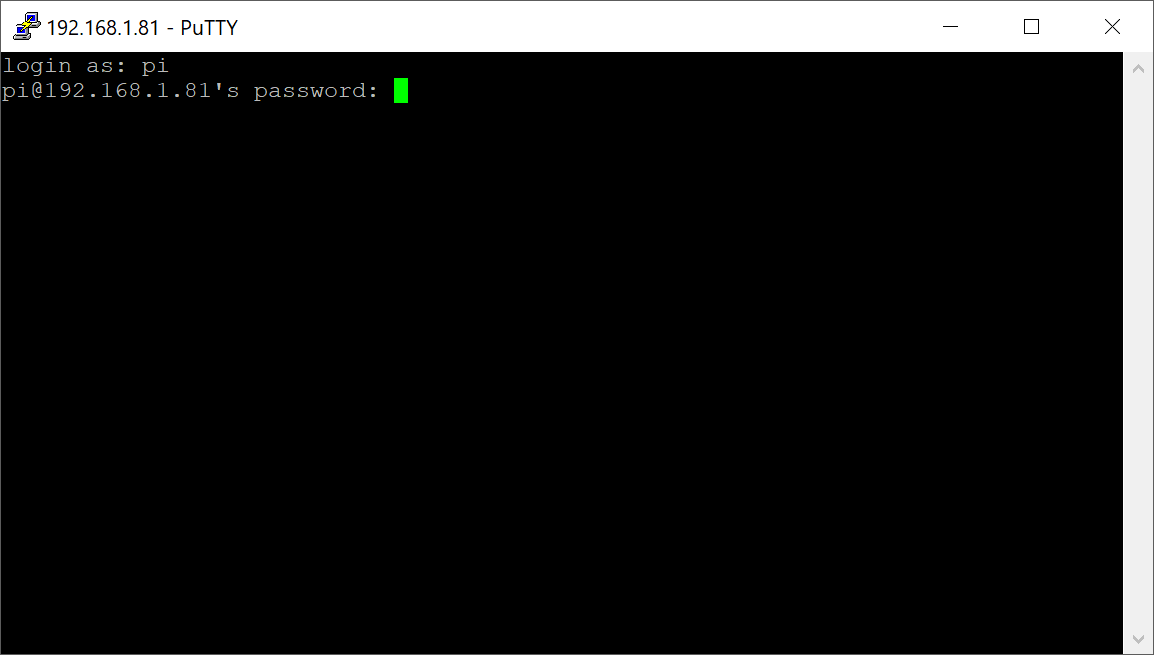
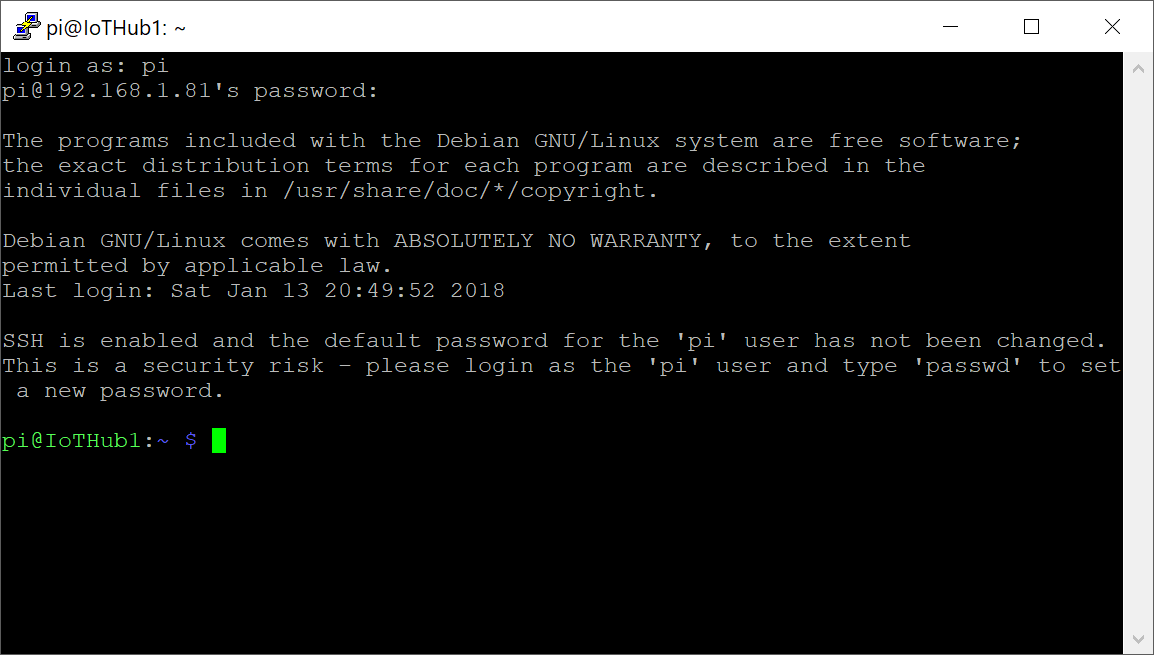
The default password for the pi user is “raspberry”, so enter the password and hit return. At this point you should be logged in remotely to the Raspberry Pi Shell;
Step 7 (Option 1) – Automatically set your Pi up using a snazzy script:
At this point you can go one of two ways; Either you can just run the setup script I spent hours making, or you can go ahead and do all the steps yourself as detailed in Step 7 (Option 2) below… The choice is yours!
Obviously, if you decide to do it yourself, then you’ll most likely learn a bit more about what we’re accomplishing… However, if you’re pushed for time, then feel free to just run the script!
I will note however, I’ve only tested this script on a vanilla install of Raspbian as the steps above detail on a Raspberry B+, so if you find any issue, then do please let me know!
Ok… Let’s continue..
To get going with this script, the first thing you need to do is clone the repo… So, with your terminal now logged in and you current directory is the pi home directory go ahead and run the following command;
git clone https://github.com/PGallagher69/NottsDevIoTHubSetup.git
Next, cd into the new NottsDevIoTHubSetup directory we’ve just created…
cd NottsDevIoTHubSetup
Next we need to make sure we can execute the setup script, so we need to set the permissions of the install.sh file such that it is executable;
chmod +x install.sh
Finally, we’re ready to run the script;
sudo ./install.sh
You’ll see nice green Sections of Comments detailing the installation procedure as it goes, and (after over an hour on the Pi B+ I used here), you should be all installed and ready to go!
Script Installation Method
Step 7 (Option 2) – Updating the Core Raspbian Files:
So… You’re coming here because you’re brave enough to attempt this all on your own? Good for you!
Now that you’re logged in to the Raspberry Pi Shell… It’s time to start getting it setup with the software we are going to be using. However, before we can do that, we’ve got some house keeping to do.
Firstly we need to Update the Core Raspbian files… This is achieved using the apt-get update command… So if you enter the following command and press enter, the Raspbian files will be updated;
sudo apt-get update
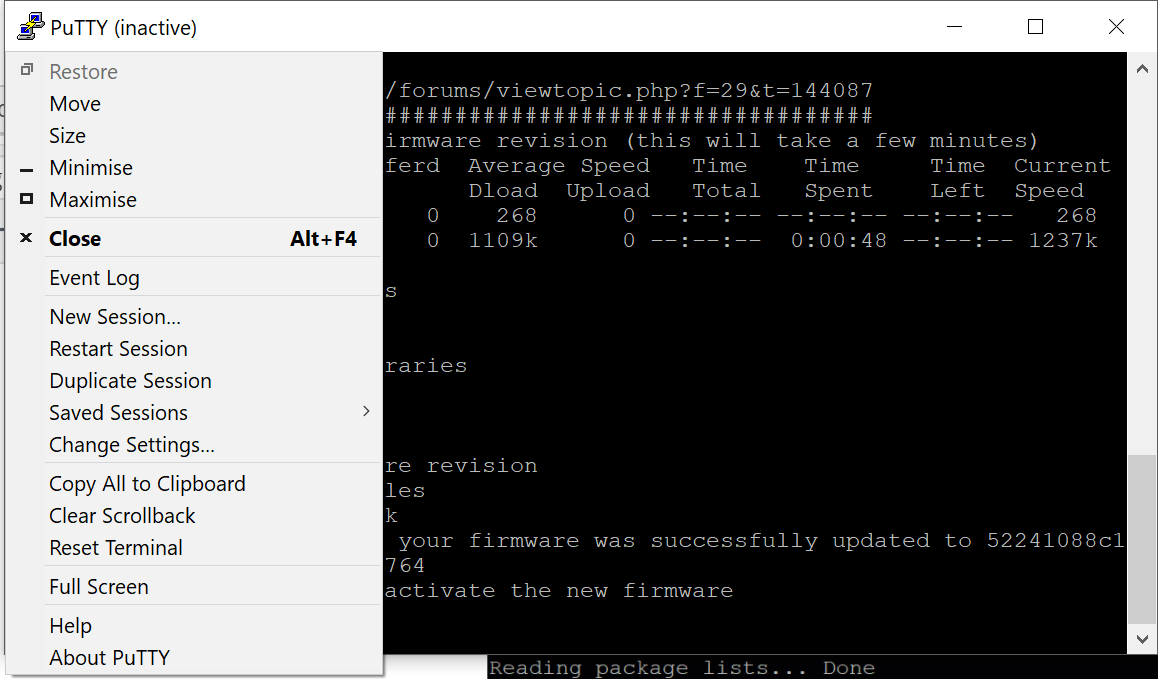
Next we need to flash the Pi with the correct version of firmware… There are some issues with some firmware versions which affect the functionality of the WiringPi library. I happen to know that one version in particular works well for what we want to do. So in order to get the correct version onto the Pi we need to run the following command;
sudo rpi-update 52241088c1da59a359110d39c1875cda56496764
You can simply copy the command above, and paste it into the terminal window you have open using your right mouse button… Ctrl+V doesn’t work in Raspbian Terminal Land;
Once the process is complete, you’ll need to reboot your Pi for the changes to take effect… You can do this by entering the Reboot Command;
sudo reboot
This will reboot the pi, ending your terminal session. If you wait a few minutes, you can reconnect by pressing the Icon in the top left corner of your now inactive terminal session window and press the Restart Session menu item;
This will then prompt you for the normal Log In and Password combination we used above; pi and raspberry.
Step 8 – Install and configure Samba File Sharing:
So that we can access our project files stored on the Pi from our PC, we need to install a file sharing tool called Samba… This allows us to share folders on the Pi that can be accessed directly from the PC.
With the Terminal Window open again, run the following command to install Samba;
sudo apt-get install samba samba-common-bin
Once the various packages have been downloaded, you’ll be asked to confirm the install, simply press the “y” key to continue with the installation;
Install Samba
Once complete we need to assign a sharing password to the default user, so run the following command;
sudo smbpasswd -a pi
You’ll be prompted to enter a password and then to confirm… Here I just use “raspberry” again to make things simple;
Set Samba Password
Next we make our directory that we want to house our code and share with the pc, which is as simple as running;
mkdir share
Next we need to set our share up. the Samba shares are configured in a .conf file in the etc/samba directory. We can edit this as the root user using nano;
sudo nano /etc/samba/smb.conf
Once Nano is opened, scroll right to the bottom using either your arrow keys or the Page Down key, and add the following configuration snippet;
[share]

Comment = Pi shared folder

Path = /home/pi/share

Browseable = yes

Writeable = Yes

only guest = no

create mask = 0777

directory mask = 0777

Public = yes

Guest ok = yes
Just in case you’ve forgotten, to paste into the terminal window, copy the snippet above then right click in the terminal window after you’ve placed the cursor where you’d like the snippet pasting. Once you’re happy with the file, press ctrl+x to exit Nano. Nano will prompt you to confirm that the file is modified and ask if you’d like to save, to which you can happily press the “y” key. It will then prompt you for a filename, at this point you can simply hit the Return key, as we want to overwrite the smb.conf file.

Setup Samba Share
To complete the Samba setup, we now need to reboot the pi again using;
sudo reboot
Step 9 – Download and build WiringPi:
In order to utilise the Pi’s GPIO (General Purpose IO) Pins, a useful library called WiringPi has been written… We can use this library from node, but first we need to download and build it.
If you’ve successfully restarted your terminal session, go ahead and run the following commands to make sure your in the Home Directory and to get the latest WiringPi library from GitHub;
cd ~/

git clone git://git.drogon.net/wiringPi
If you struggle to get the official repo above to work, then try;
git clone https://github.com/WiringPi/WiringPi.git
The next thing we need to do is build the library for use on our particular flavour of Raspberry Pi… Run the following commands to navigate into the WiringPi directory and build it;
cd wiringPi

./build
Build Wiring Pi
Step 10 – Install the correct version of Node.js
The code we’ll be using in the Workshop (Link to follow), will be dependant upon version 6.10.2 of Node.js. Raspbian Jessie actually ships with a version of Node.js preinstalled called Node Red… But this version isn’t compatible with what we need… So we need to uninstall that and install the correct version of Node.js.
Firstly we run the command to uninstall Node Red;
sudo apt-get remove nodered -y
Remove Node Red
Next we need to remove the remaining Node.js Binaries… Run the following command;
sudo apt-get remove nodejs -y
Remove Node Binaries
Now we need to install the correct version of Node.js… There’s actually a very handy package called Node Version Manager or NVM, which allows easy switching between node.js Versions… To install NVM run the following commands;
cd ~/

curl -L https://git.io/n-install | bash
Next we need to have NVM install version 6.10.2 of node for us… Thankfully this is a very simple operation now, where we simply run the following commands to reset the terminal and download Node.js version 6.10.2;
. /home/pi/.bashrc

n 6.10.2
Running the command node -v will now show that we are indeed running Node.js version 6.10.2;

The final step to get Node.js working properly is to allow the root or Sudo user access to the binaries…This is because the version of Node.js we just installed is stored in our own home directory, which is specific to the Pi user… The Sudo user doesn’t know about the existence of the Node.js installation in this directory. We need the Sudo user to be able to run Node as the WiringPi libraries rely on root access.
Running the following compound command will copy the binaries to a location that the Sudo user can access;
n=$(which node); n=${n%/bin/node}; chmod -R 755 $n/bin/*; sudo cp -r $n/{bin,lib,share} /usr/local
Allow Sudo Node
Step 11 – Download and Install the Workshop Code:
Ok, now that our Raspberry Pi is all ship shape… It’s time to download and install the code for the workshop. Navigate to the “share” directory we created earlier on using;
cd ~/share
Next we need to grab the code from Github;
git clone -b start https://github.com/PGallagher69/NottsDevIoTHub.git
We can then navigate into the NottsDevIoTHub directory and check that everything has downloaded correctly using;
cd NottsDevIoTHub

dir

Next we need to download all of the Node Packages that our project requires. We use Node Package Manager or NPM for this;
npm install
This process can take a very long time to complete, anywhere upwards of 40 minutes in some cases… So just leave it be and it will eventually finish;
I’ve sped the GIF above up by about 20 or 30 times!
Now you can build your circuit!
Now that you’ve got your Pi all setup… It’s time to move on to building up the circuit…
You can find the step by step instructions right here
Leave A Comment
You must be logged in to post a comment.